What is a VPS and why do you need one?
A VPS (Virtual Private Server) is a dedicated cloud computer that runs your AI systems 24/7 — even when your laptop is off. Think of it as the engine room for your automations. Everything we build for you lives here.
We use Hostinger because it's reliable, affordable, and straightforward to set up. The KVM 2 plan is all you need.
Go to Hostinger and navigate to VPS Hosting. Select the KVM 2 plan.
On the checkout page, you'll see your cart:
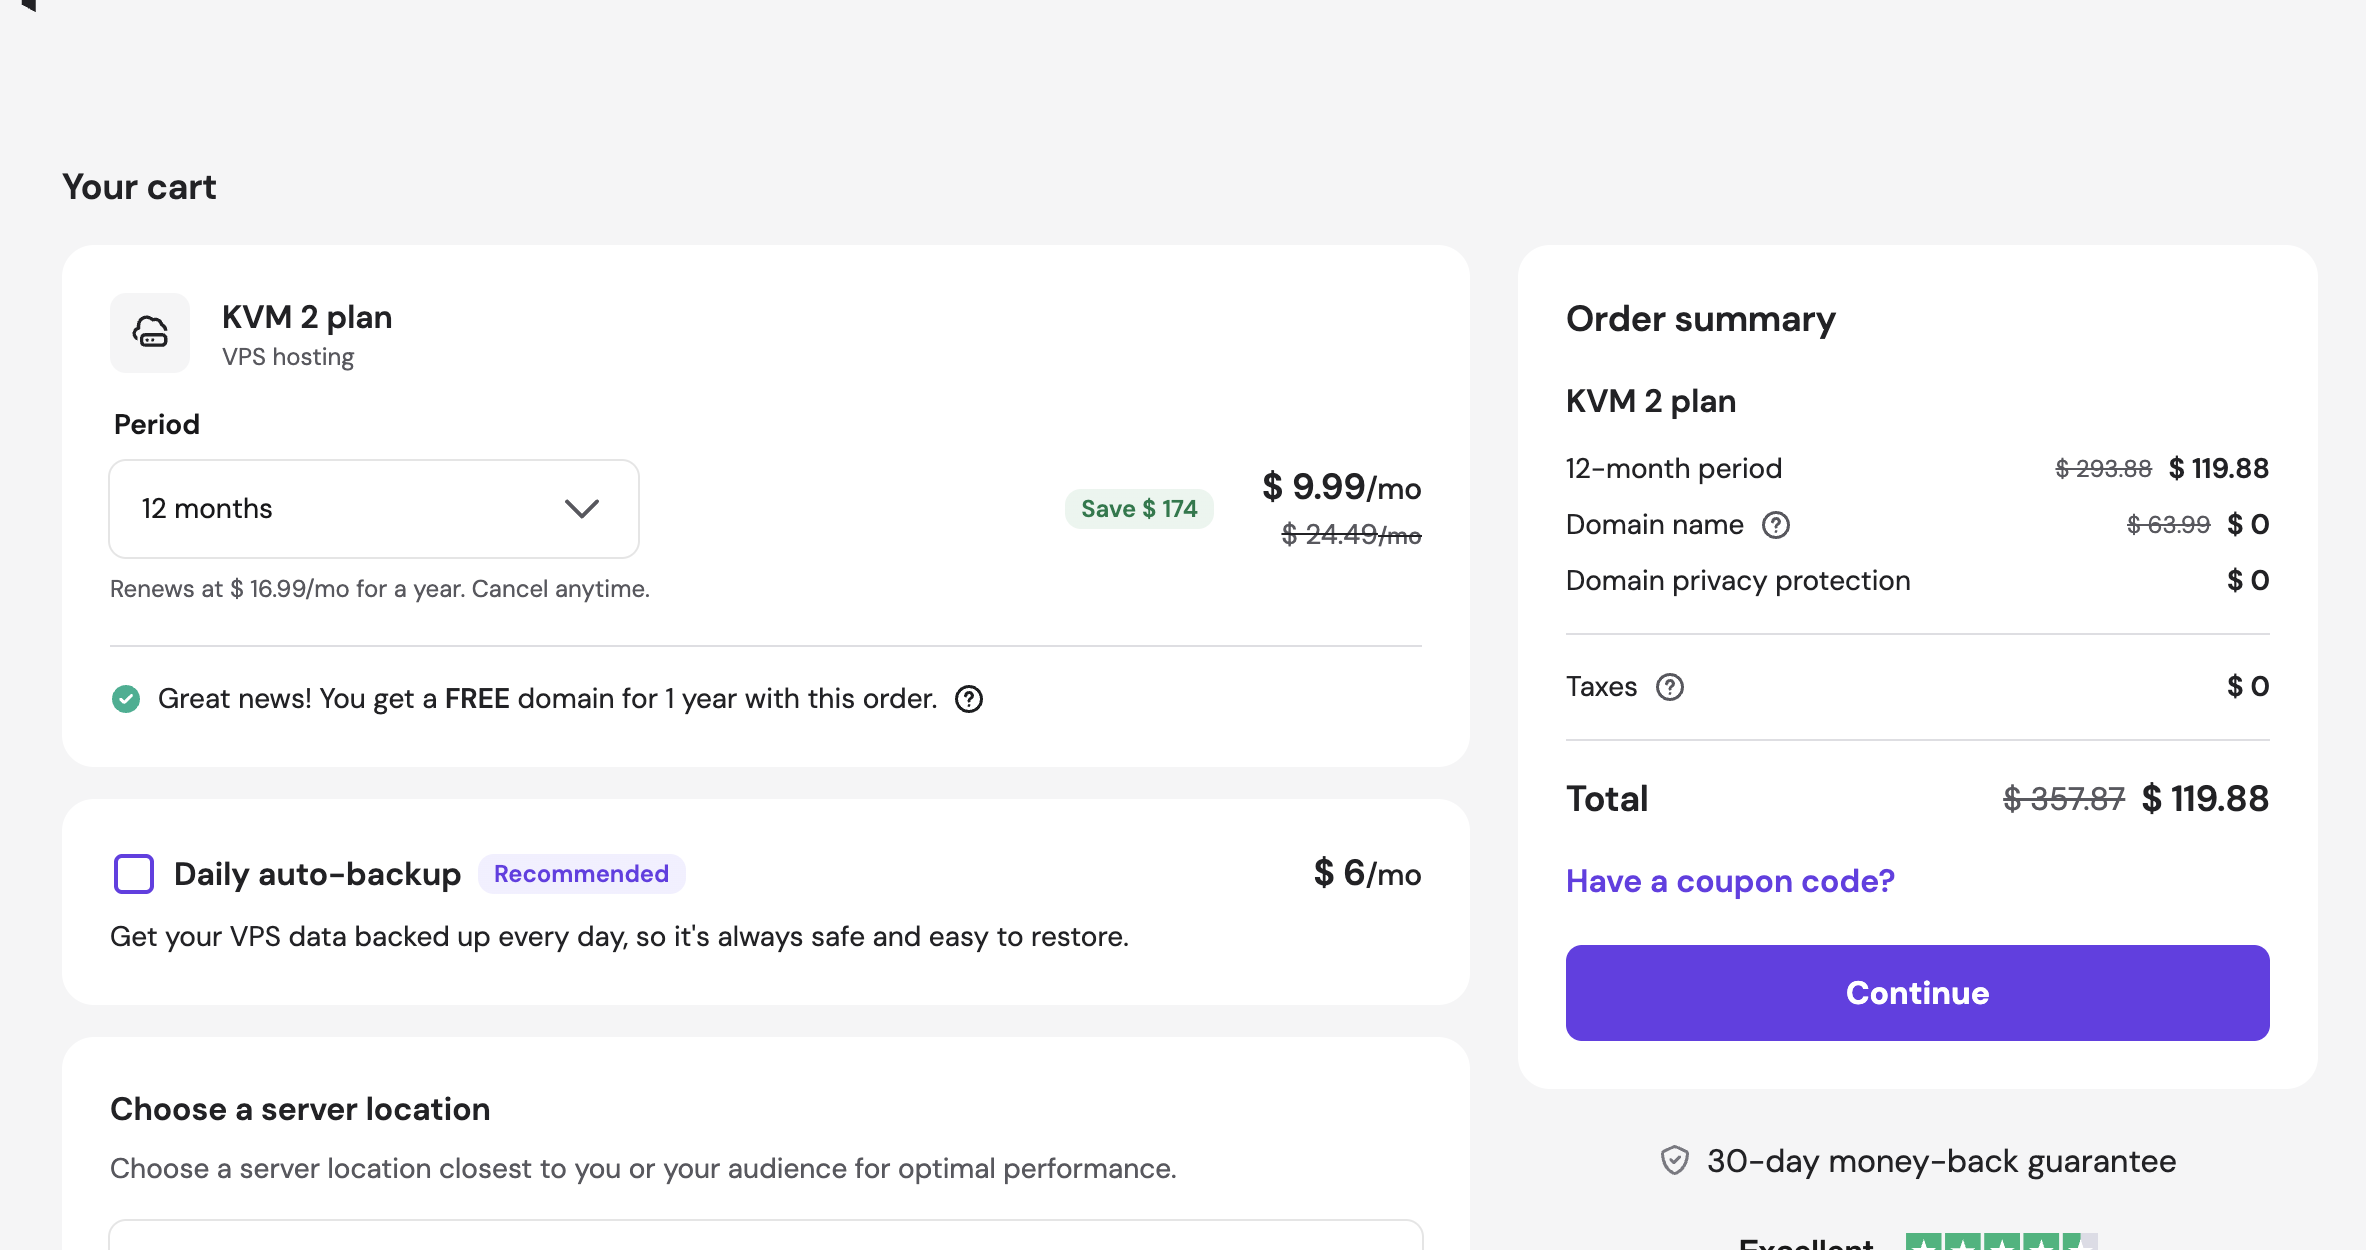
- Period: 12 months (saves you $174 vs month-to-month)
- Daily auto-backup: Optional, but recommended for peace of mind
- Domain: You get one free — skip it if you already have one
Hit Continue and complete payment.
After payment, Hostinger will ask you to configure your server.
Server location: Select United States (best performance for US-based operations — 43ms latency).
Operating system: Click Ubuntu.
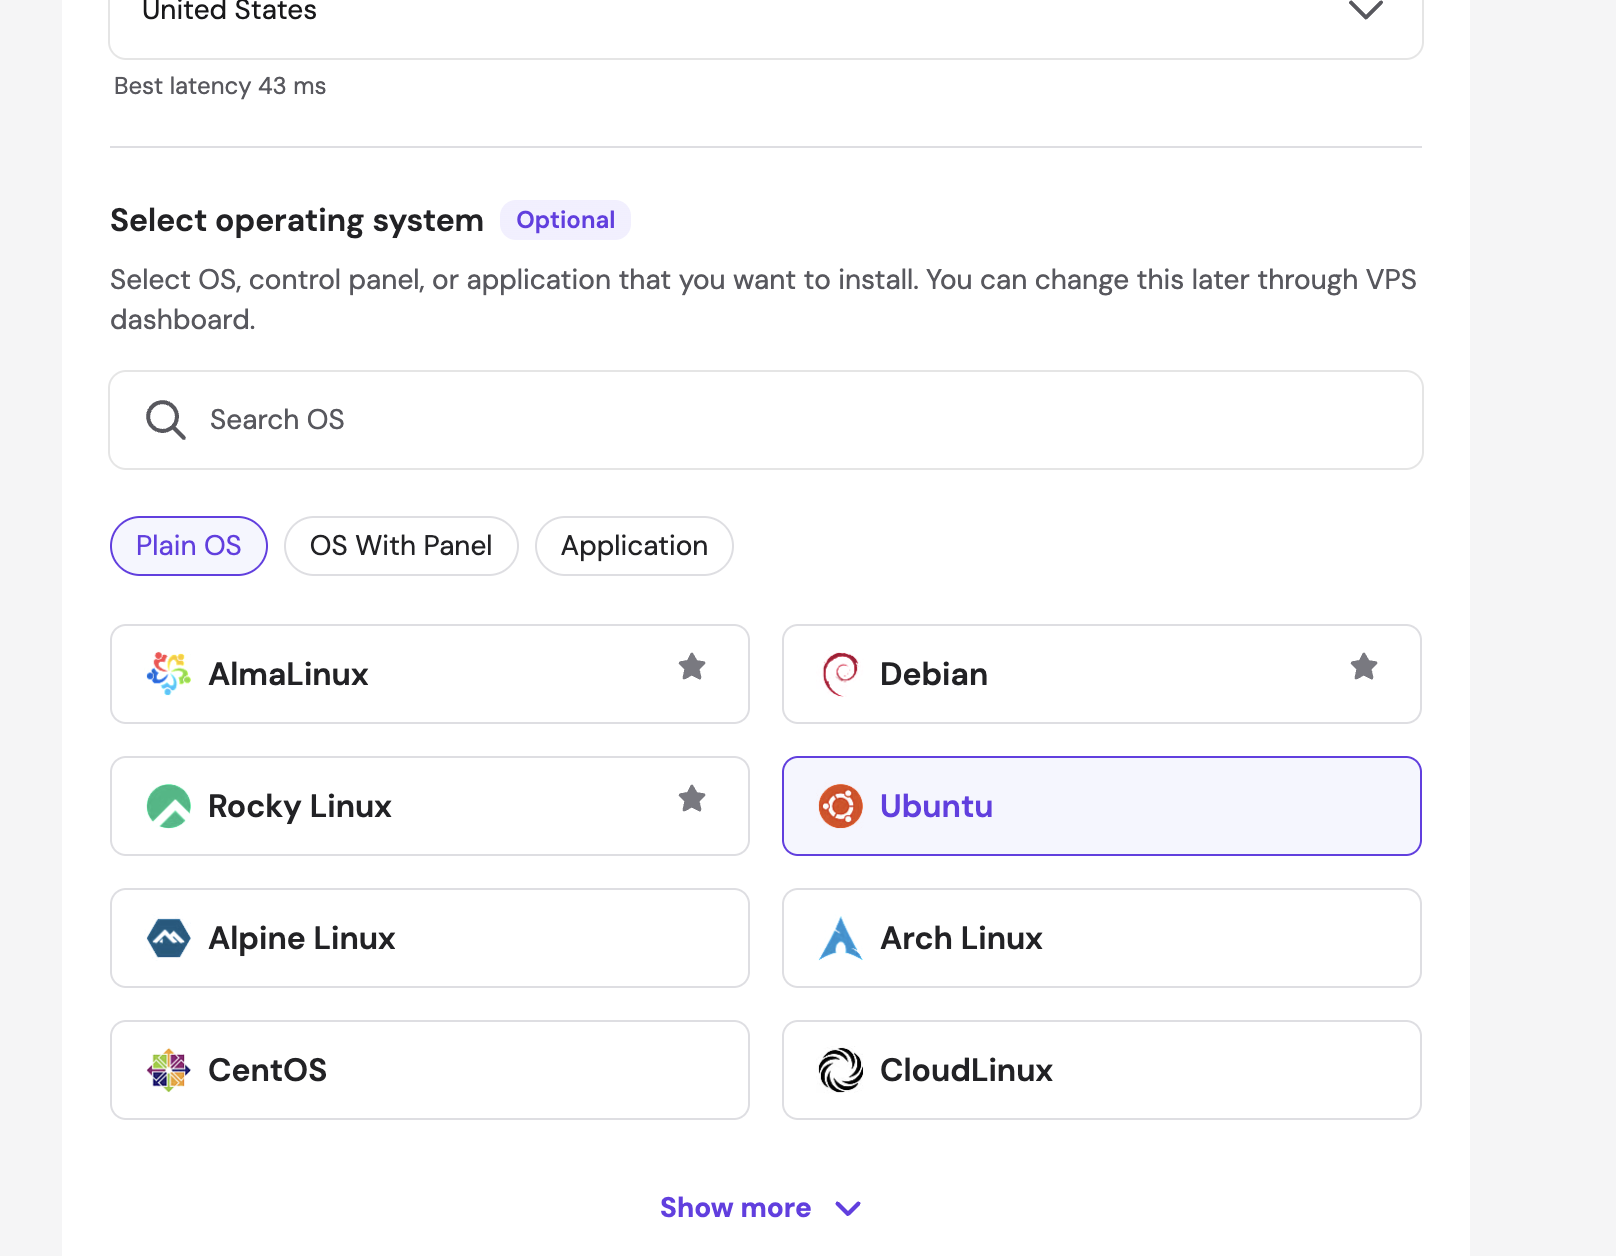
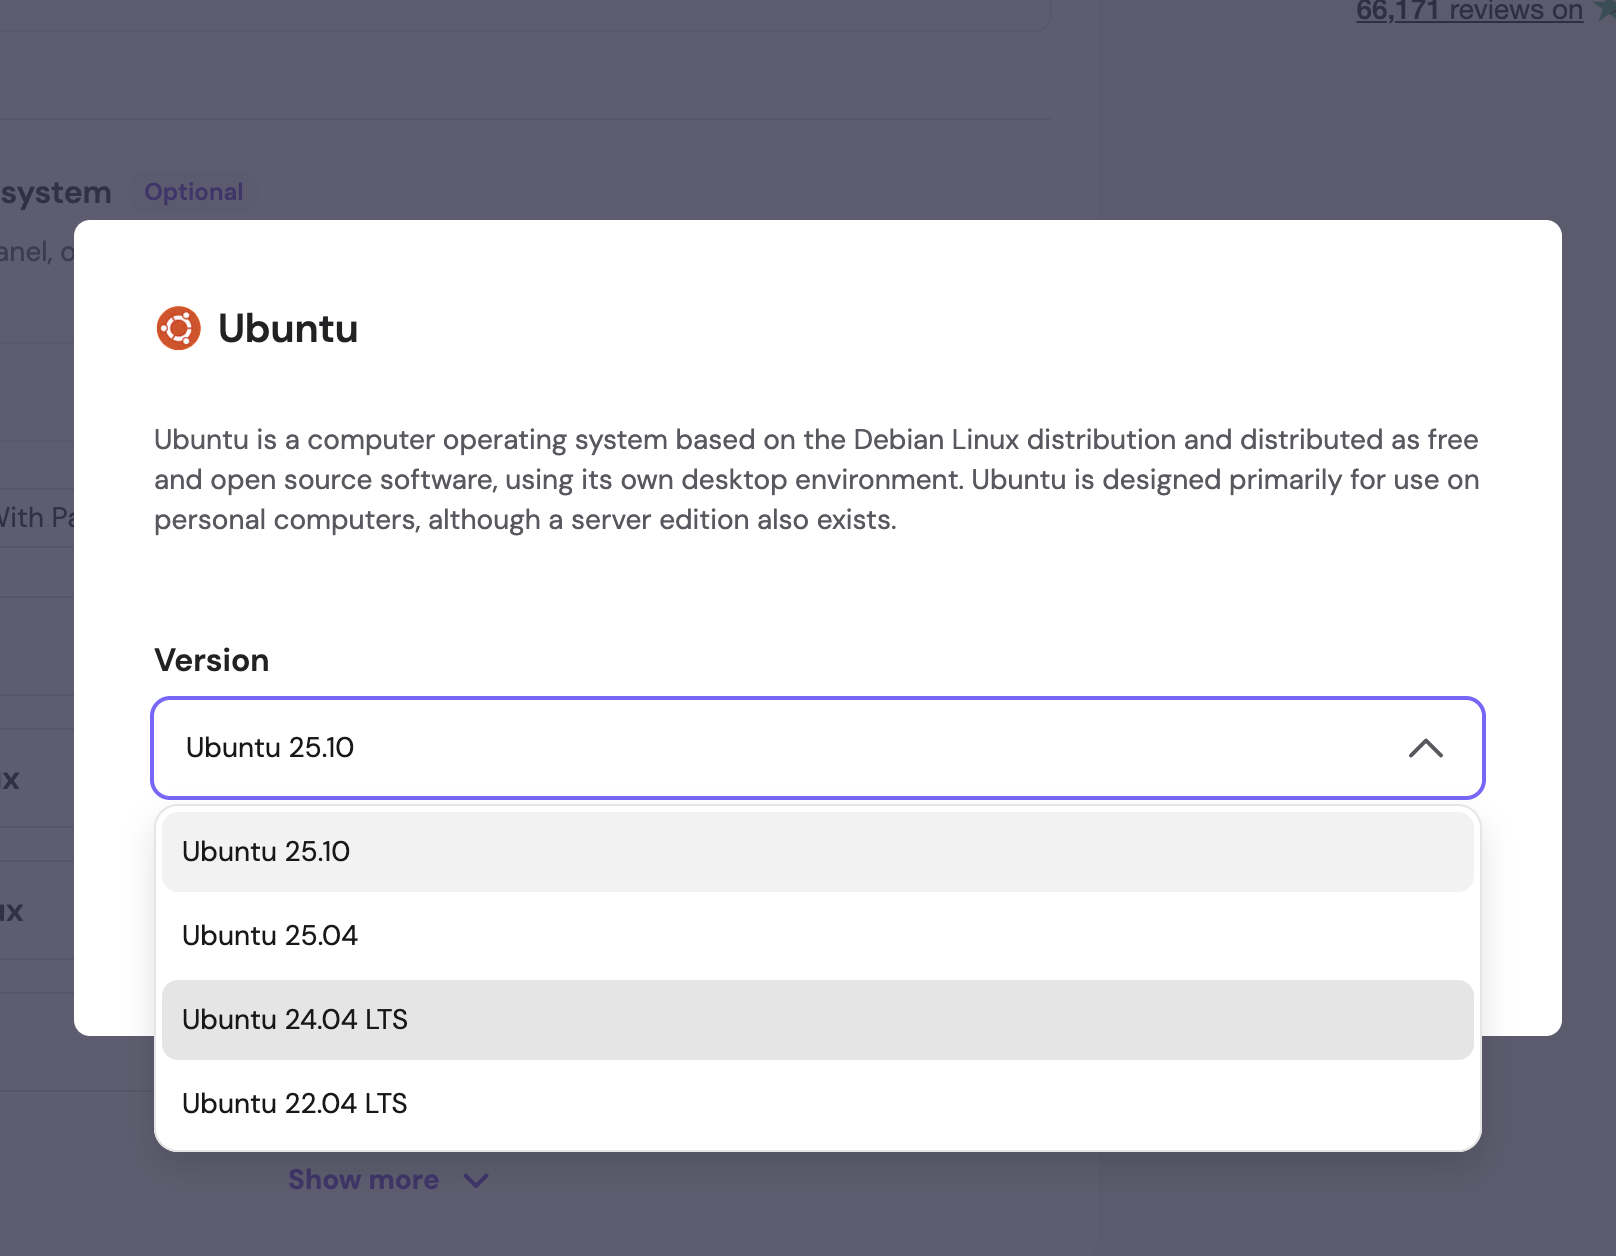
After clicking Ubuntu, a popup will appear asking you to choose a version. Click the dropdown:
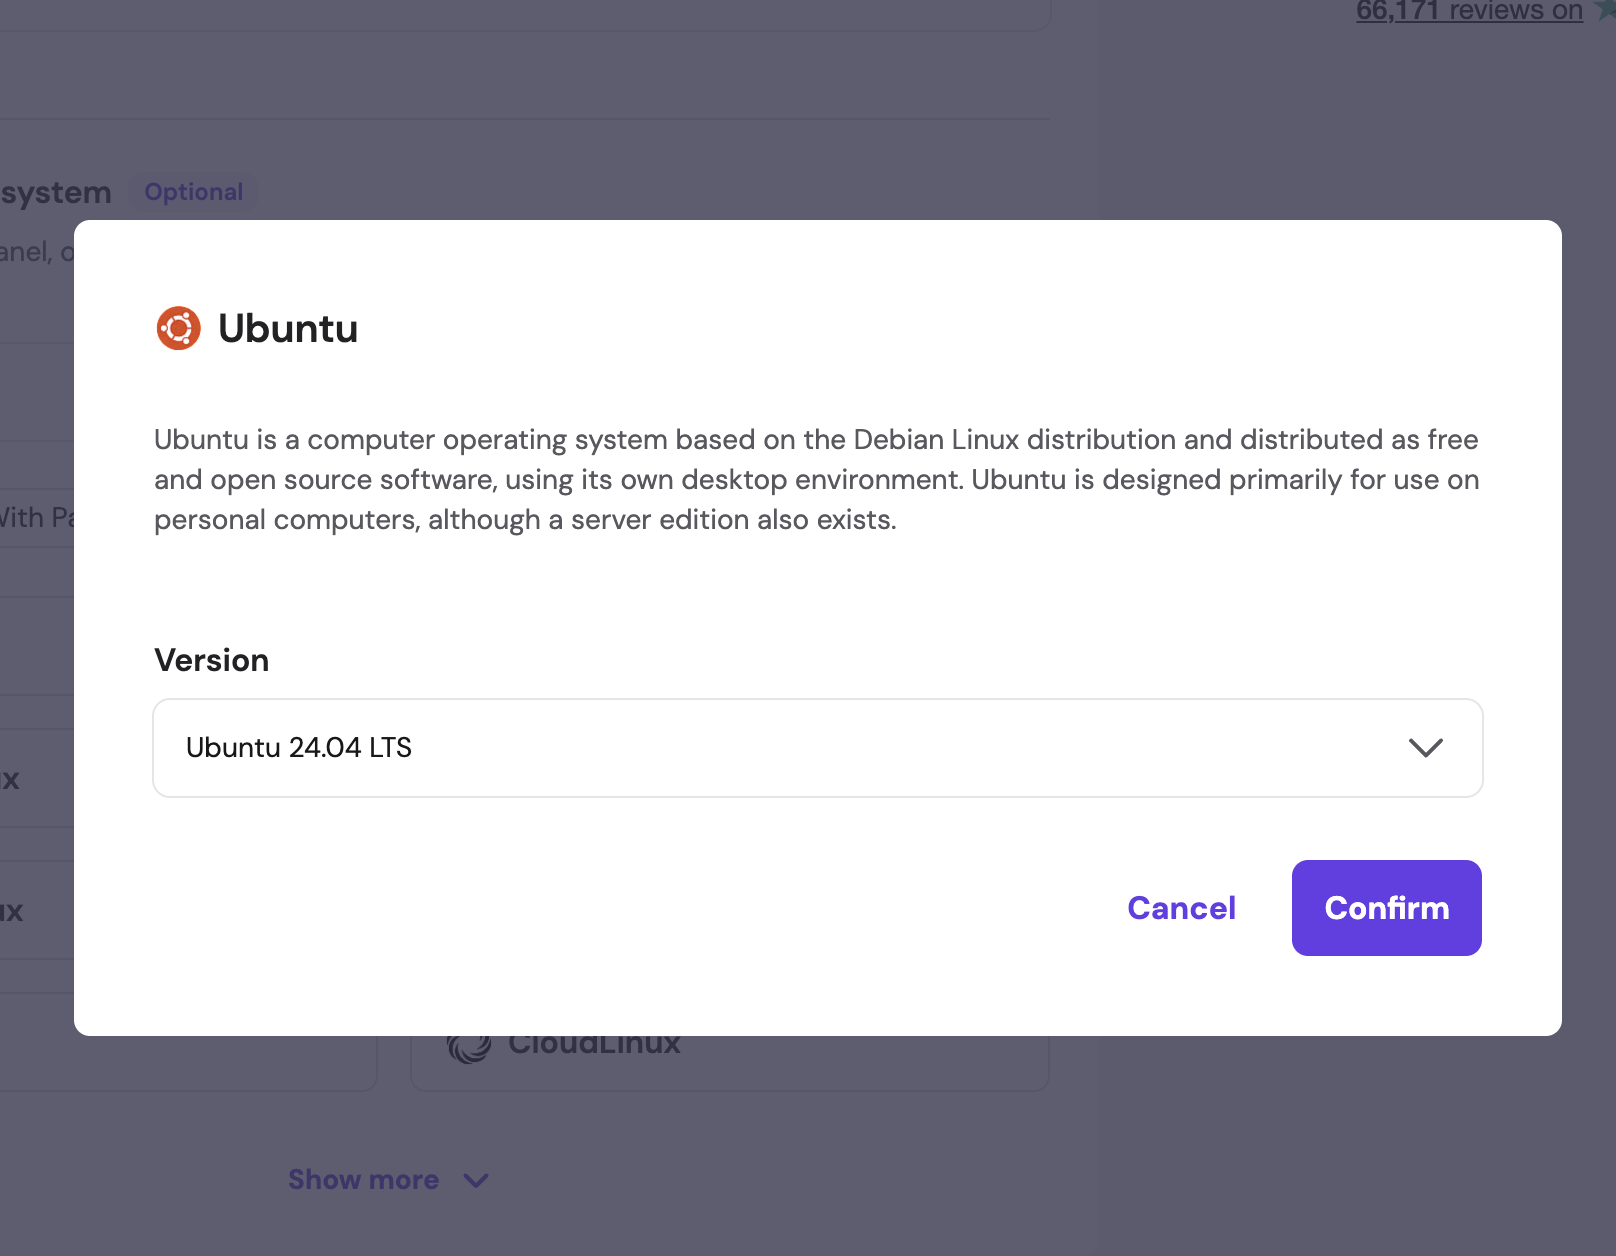
Once 24.04 LTS is selected, hit Confirm:
Once Hostinger finishes provisioning your server (usually less than 2 minutes), head to the VPS section in the left sidebar.
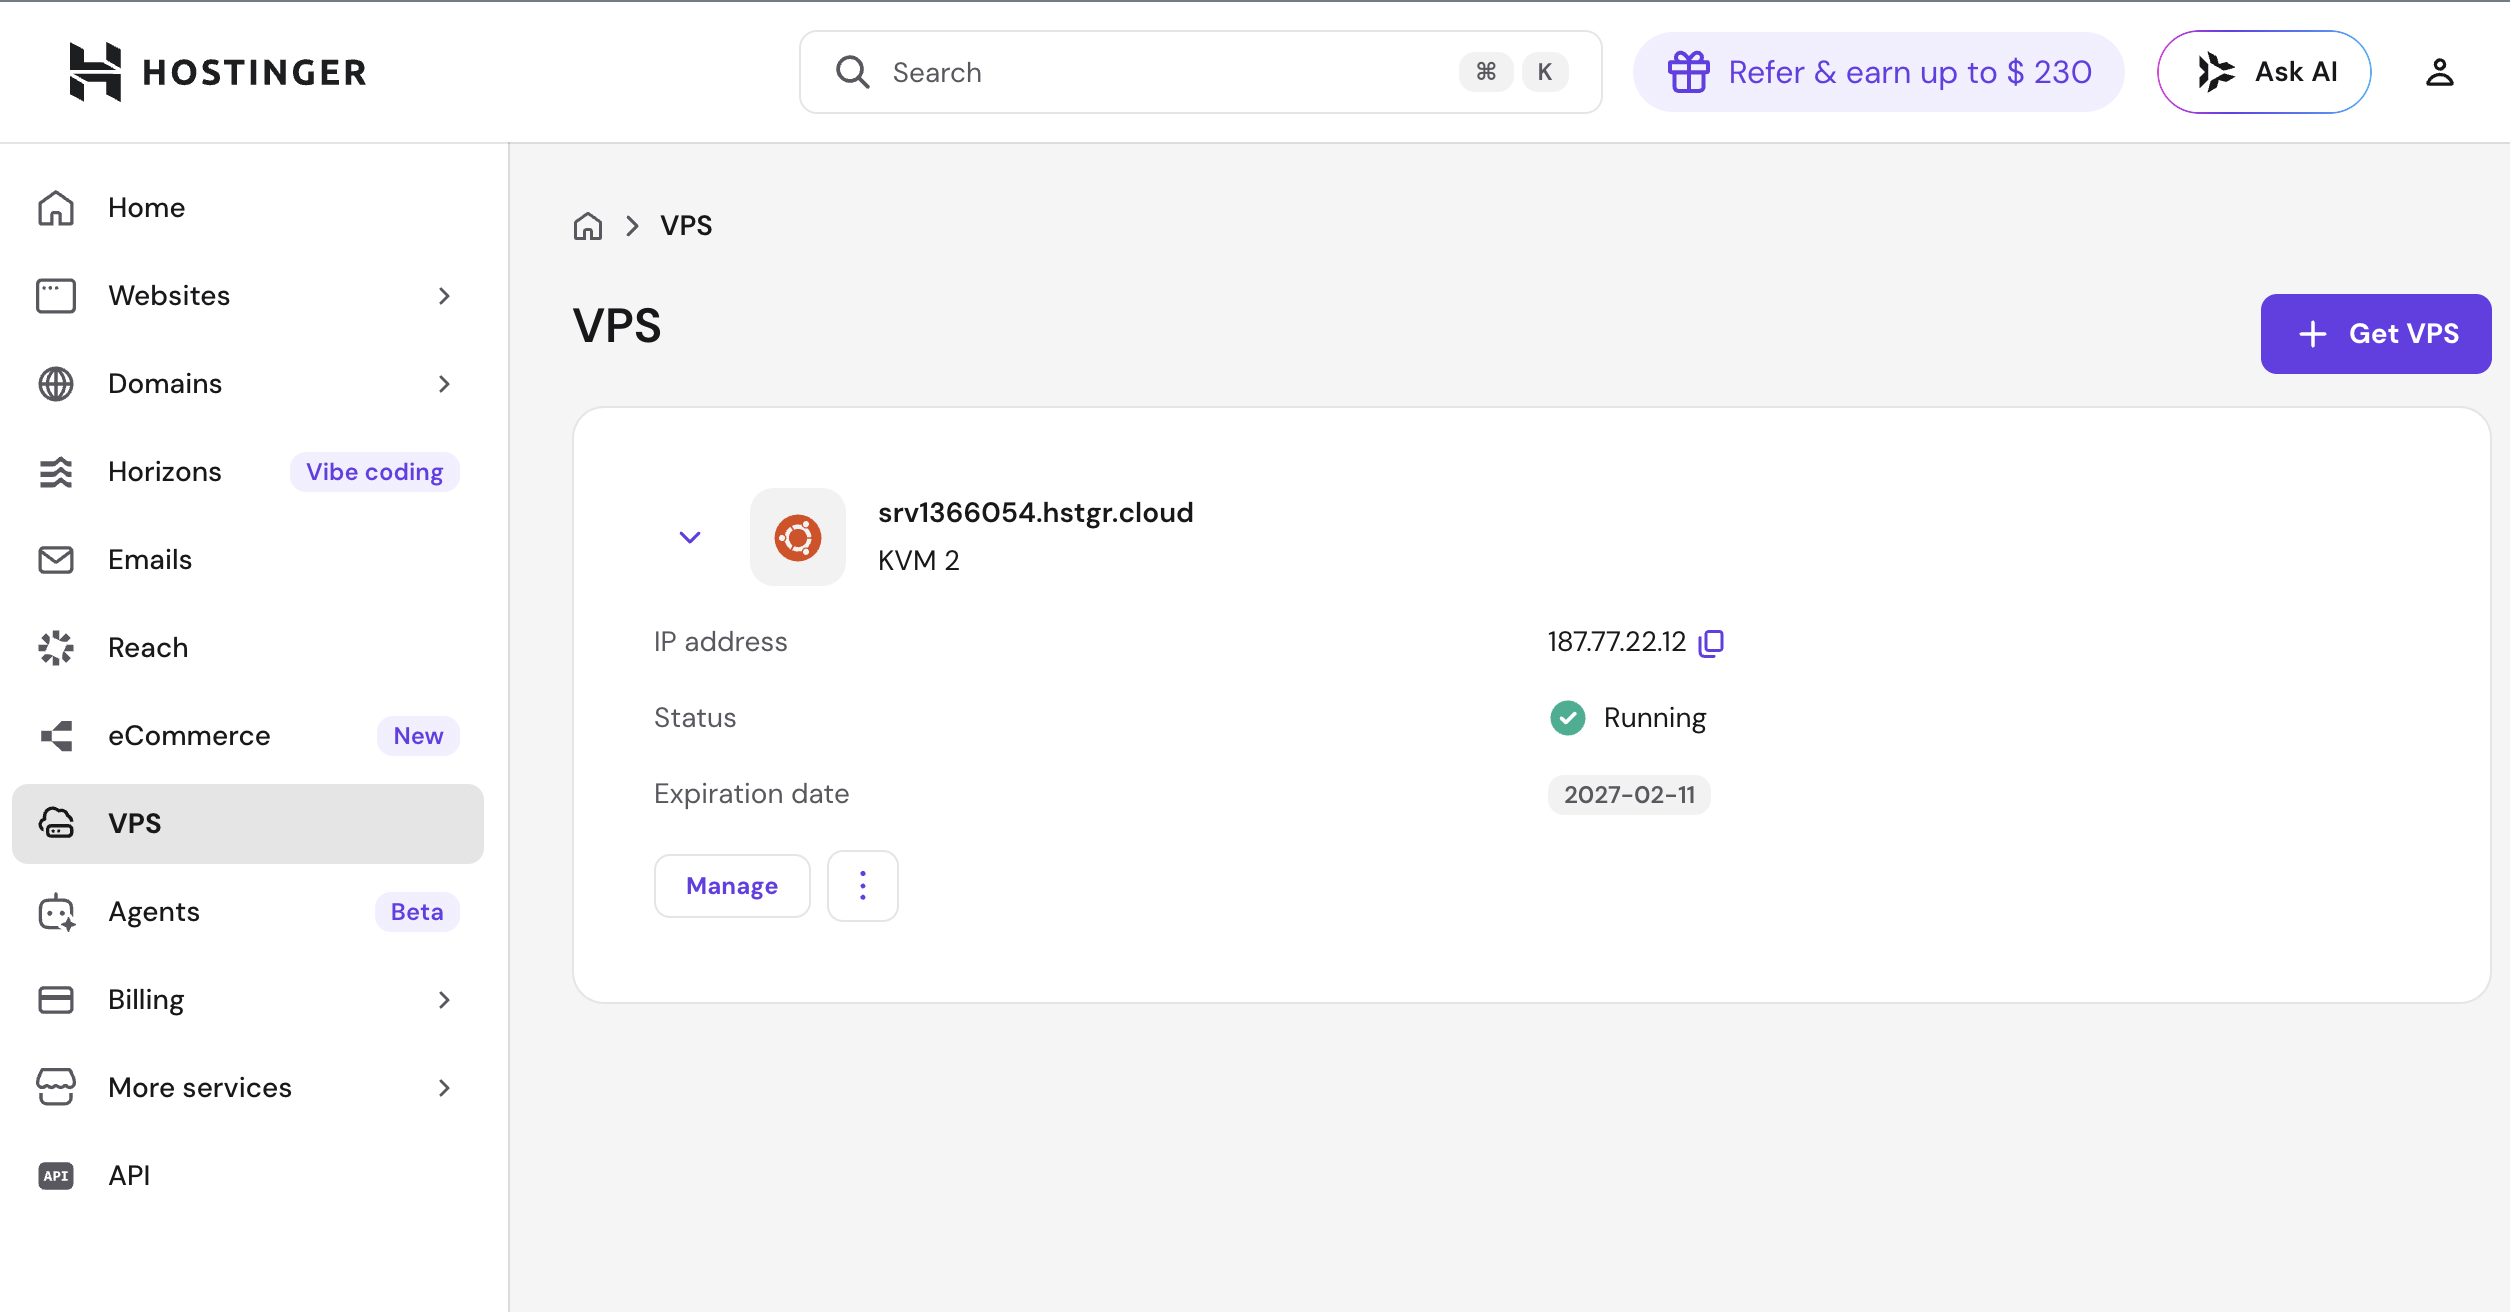
You'll see your new server listed with:
- A hostname (like srv1xxxxxx.hstgr.cloud)
- Your server's IP address — save this, you'll need it
- Status: Running (green checkmark)
Click Manage to open the server dashboard.
Inside the dashboard, you'll land on the Overview page.
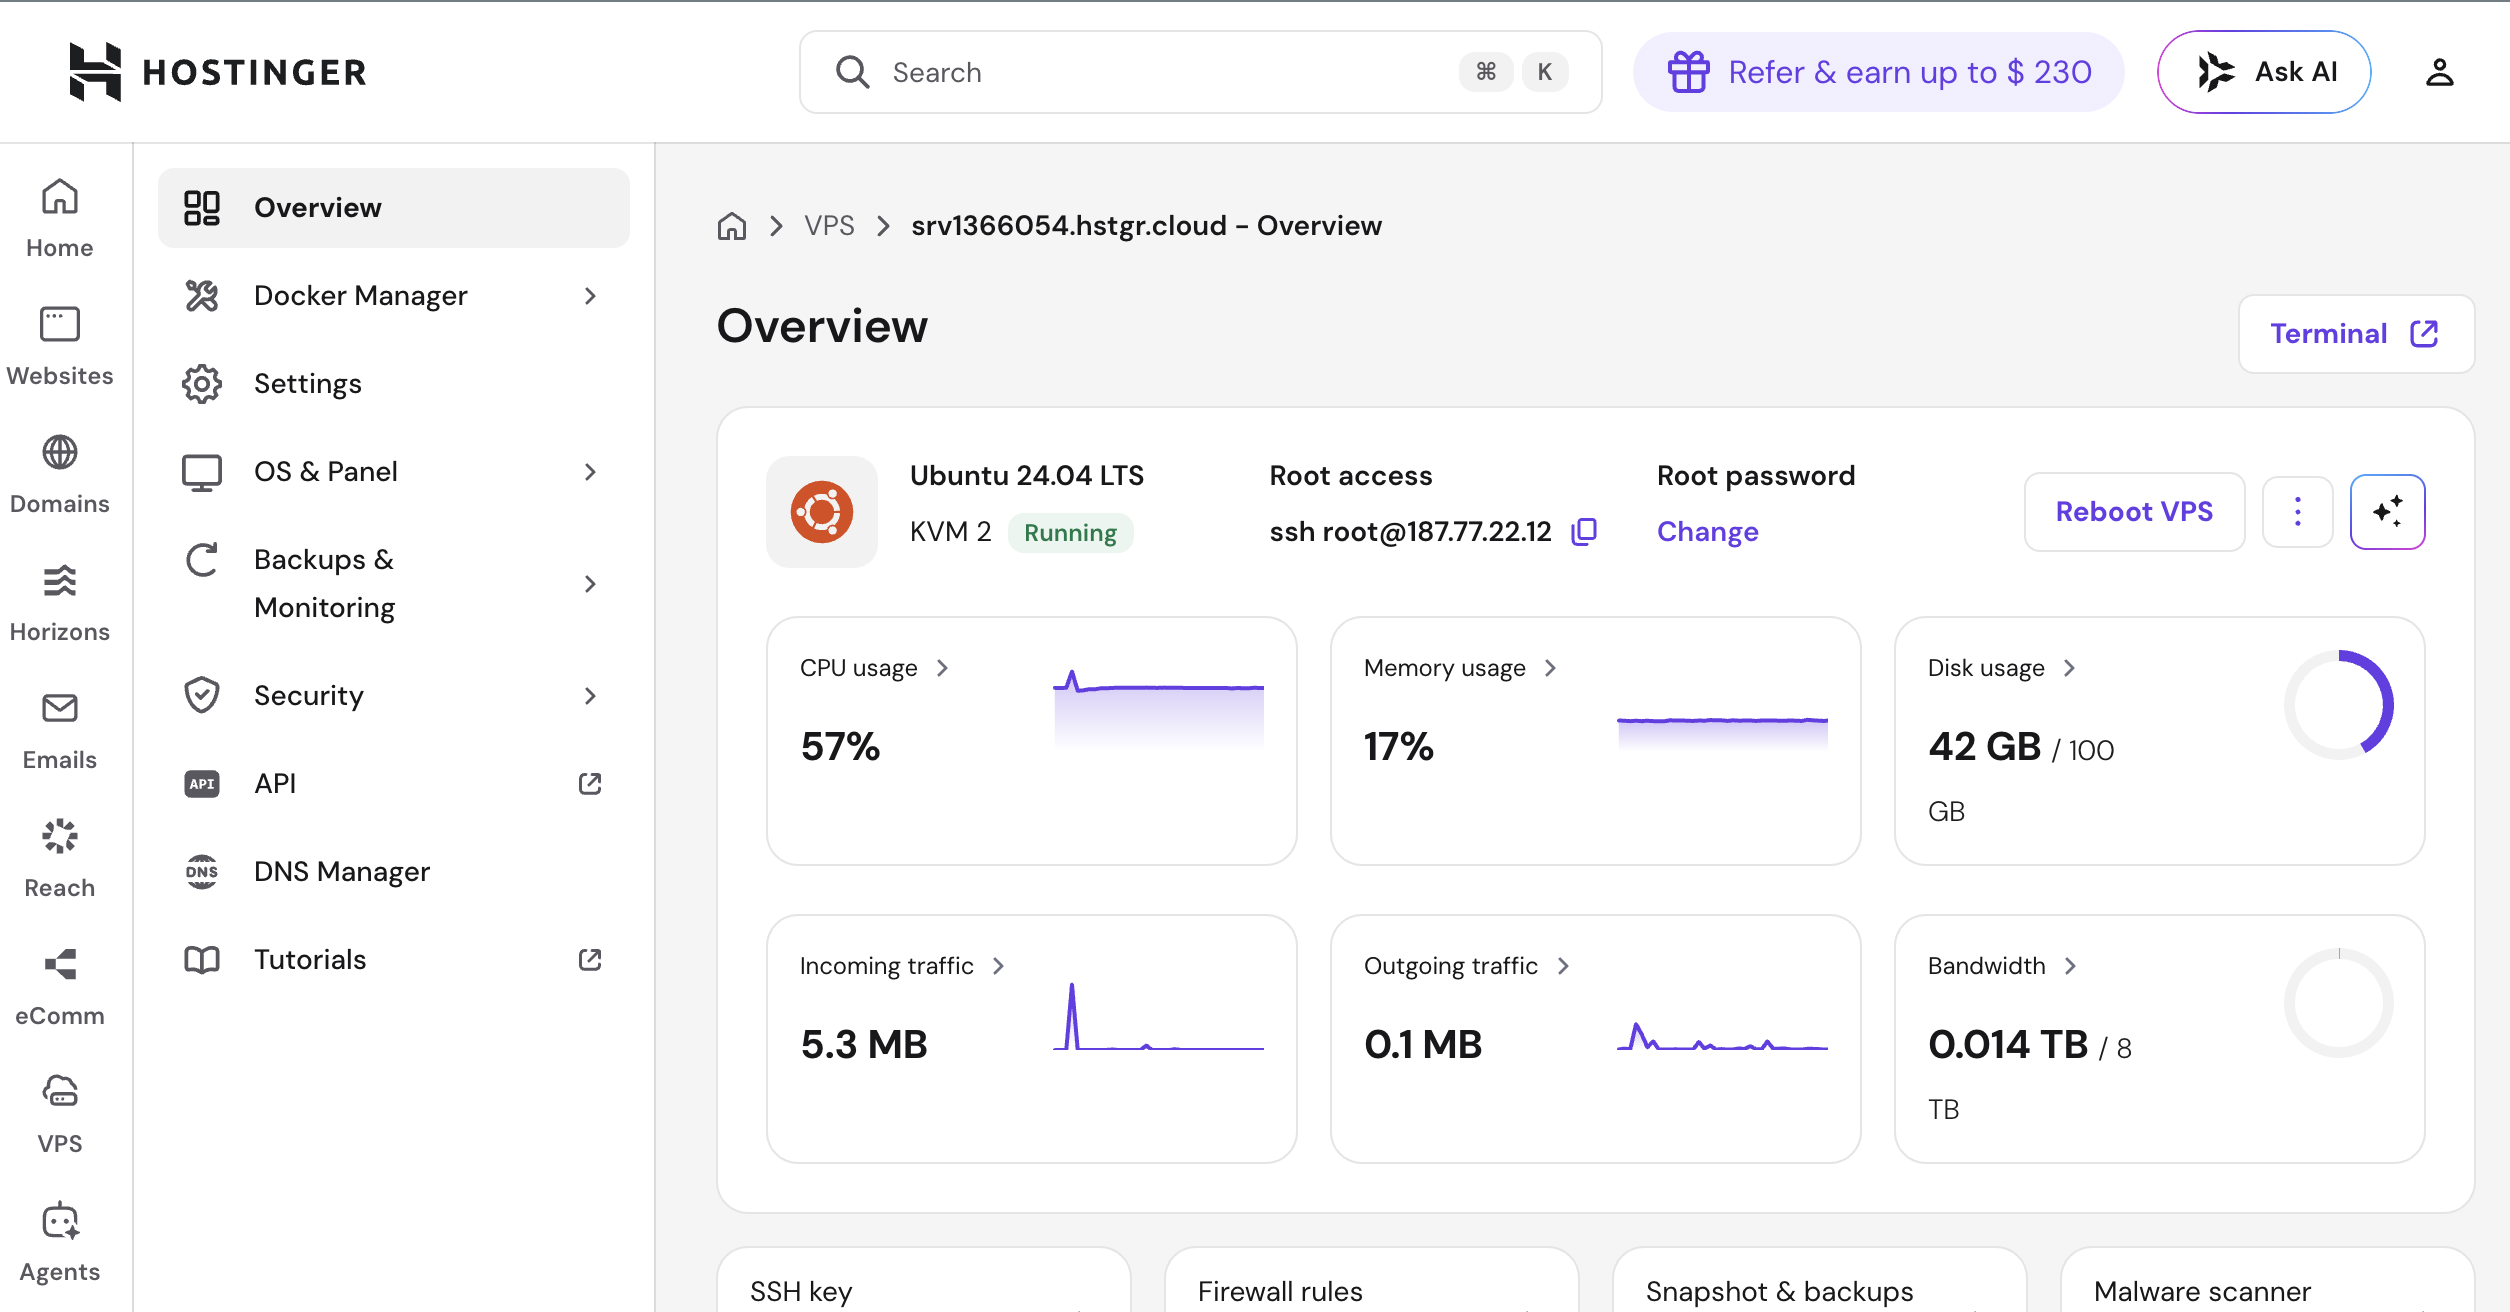
You don't need to understand everything here, but note these key things:
- OS: Ubuntu 24.04 LTS (should match what you picked)
- Status: Running
- SSH root access: You'll see
ssh root@your-ip-address
In the left sidebar, click Settings, then open the Main settings tab.
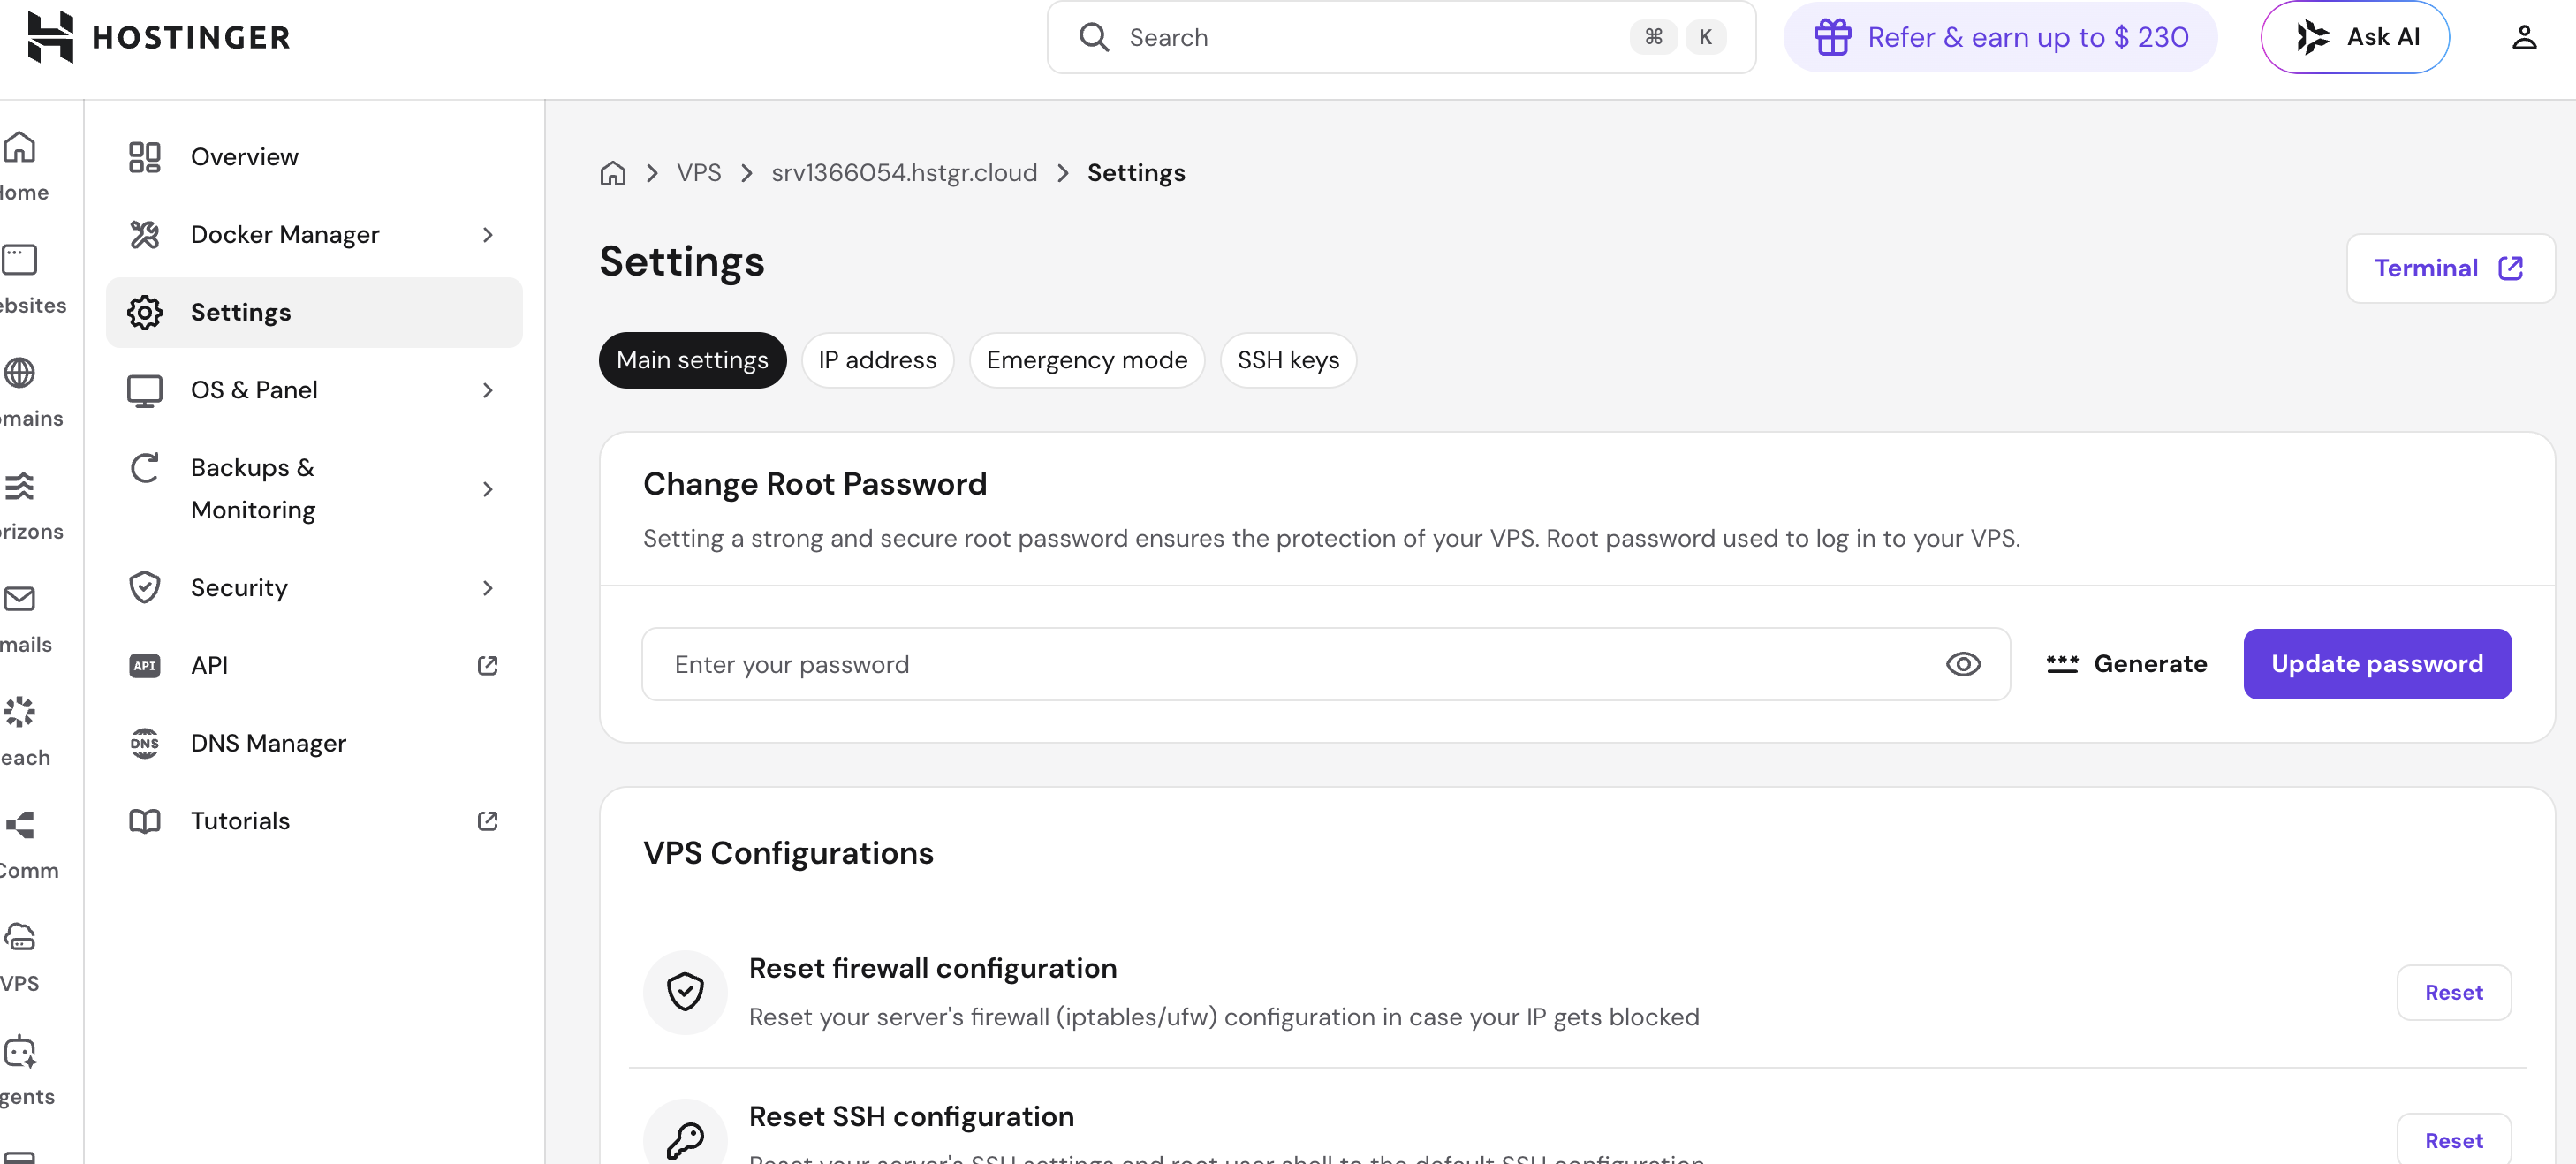
Under Change Root Password:
- Click Generate to create a strong password
- Copy that password and save it somewhere secure (1Password, Notes, etc.)
- Click Update password
Hostinger lets you grant access to your VPS without sharing your main account password. This is the safest way to give our team the access we need to build your systems.
In your Hostinger dashboard, click your name in the top right corner. A dropdown menu will appear. Select Account sharing.
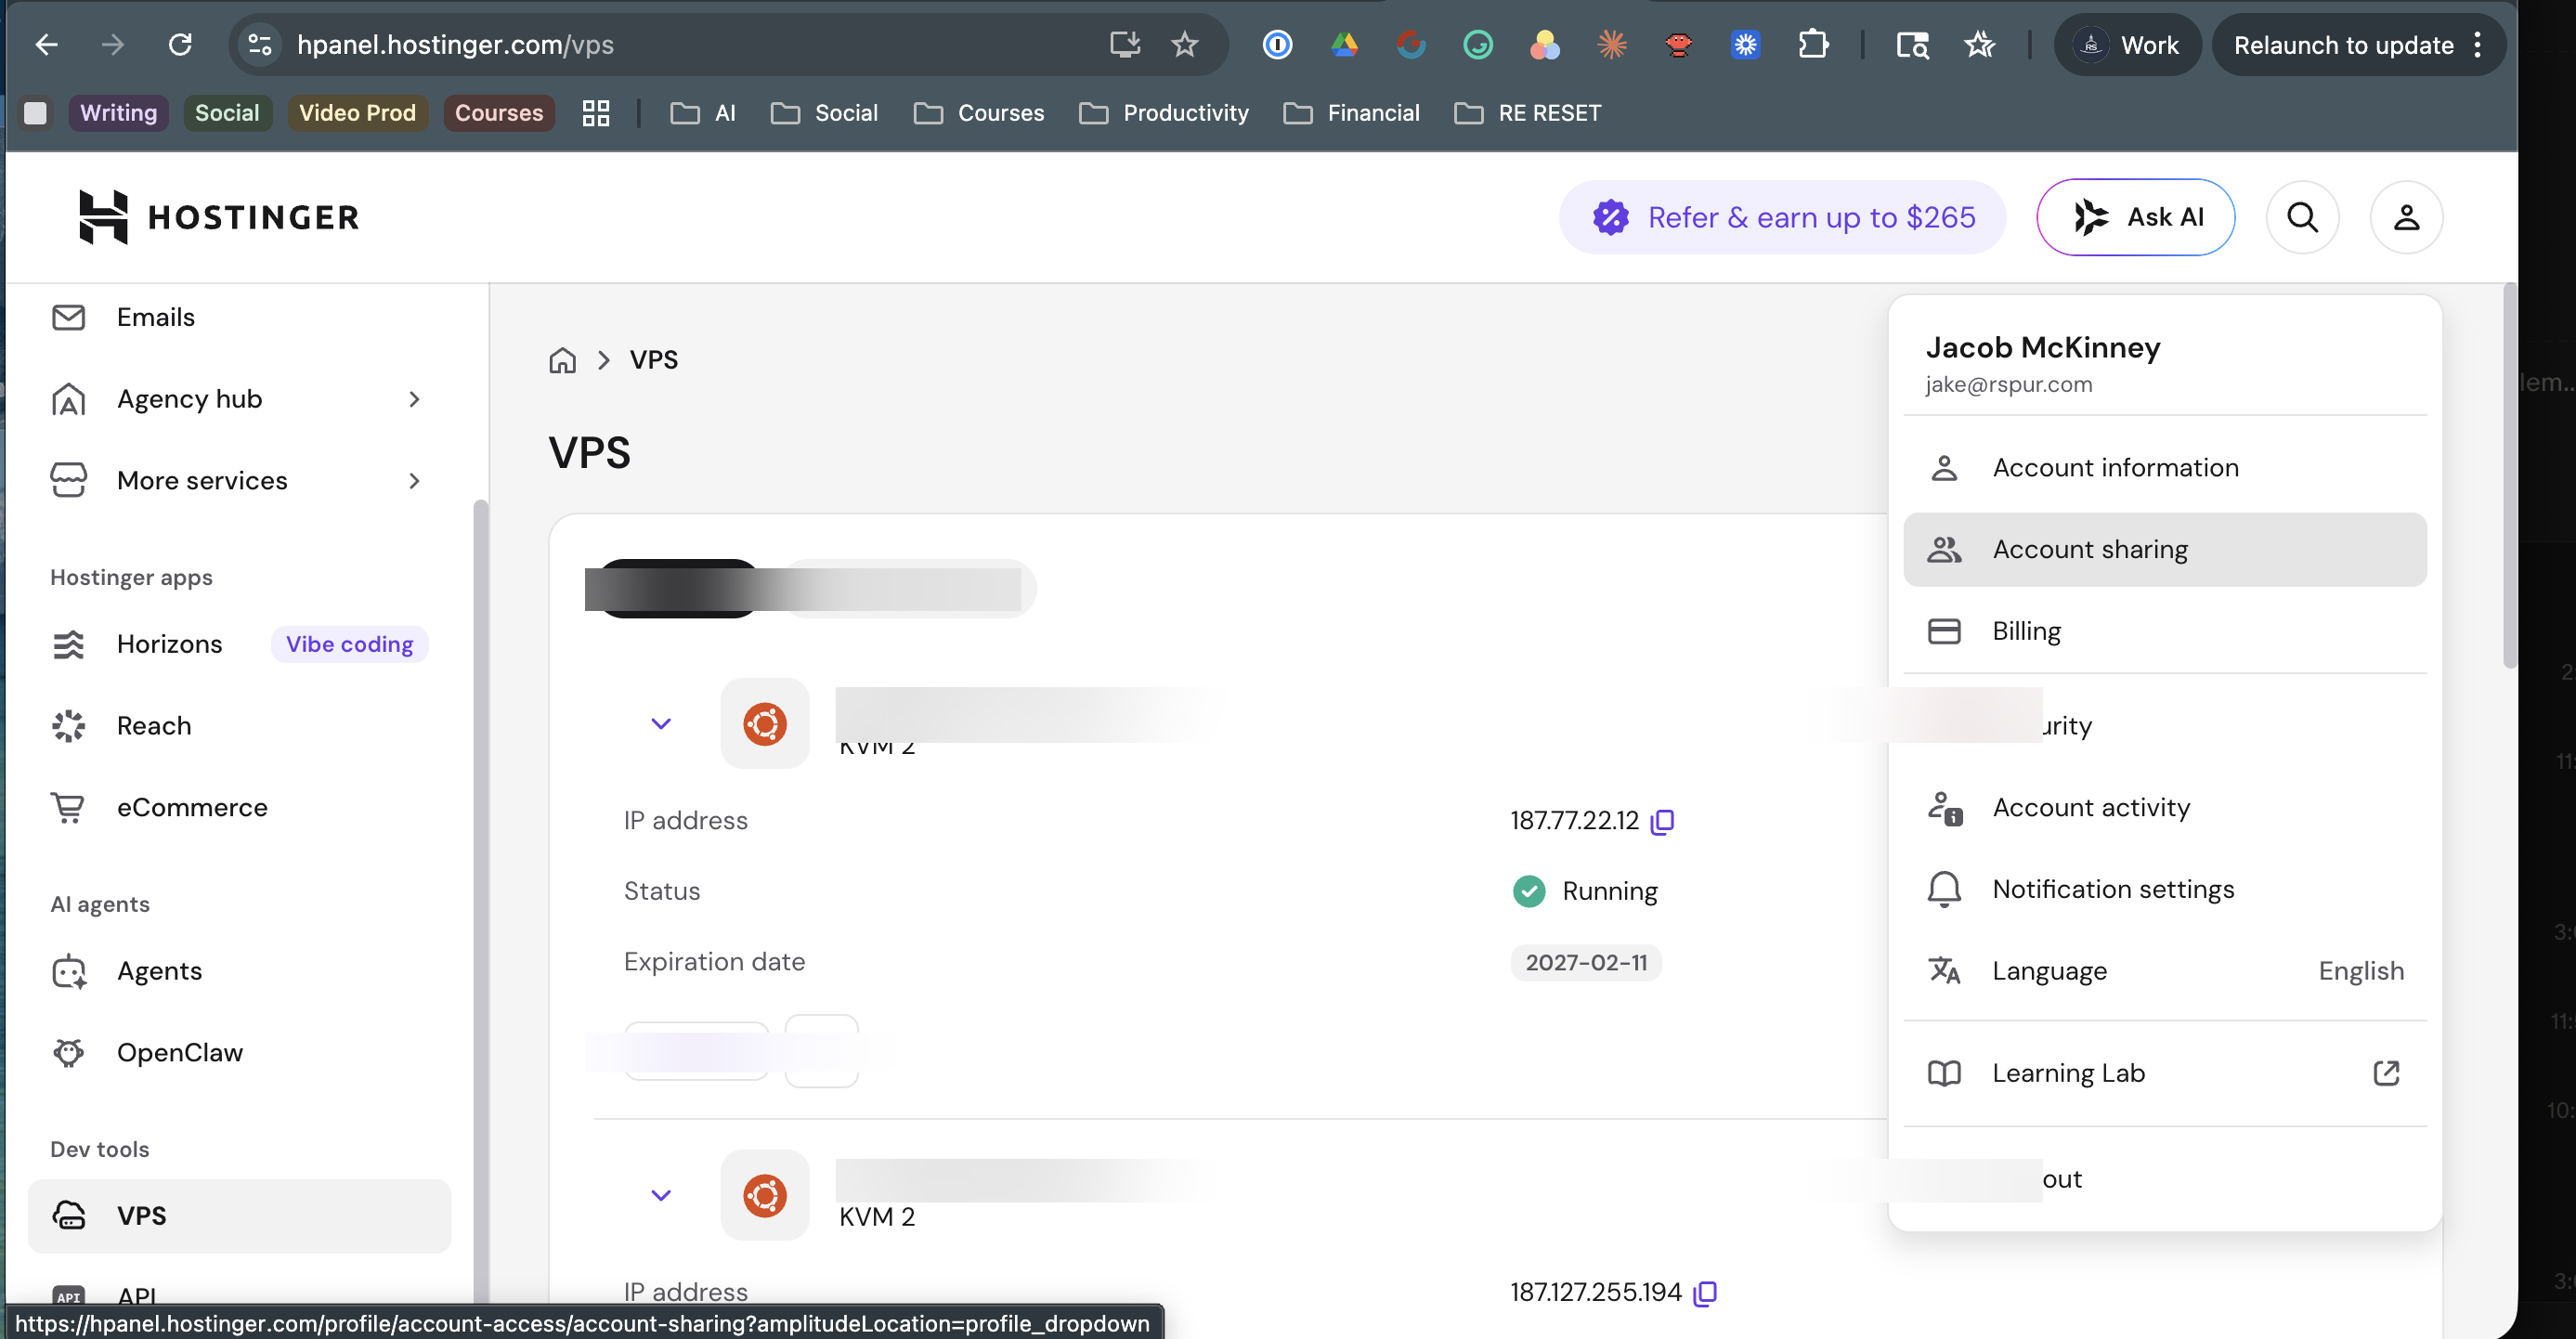
On the Account Sharing page, click the Give access tab, then click the purple Give access button.
- Enter the email: jake@rspur.com
- Select Manage Services & Billing for access type
- Click Send invitation
We will receive an email and accept the invitation on our end. Once accepted, we can manage your VPS directly from our own Hostinger dashboard.
You're Done.
Once you've completed these 7 steps, your server is ready. Send us:
- Your server IP address
- Your root password (via the secure link we provide)
- VPS access shared with jake@rspur.com (Step 7)
We'll take it from there.